Spdt dpdt wire terminal Infopower blog: switches from interpower Wiring diagram for double pole single throw switch
Double Pole Toggle Switch Wiring Diagram - WiringDiagramPicture
Single pole switch diagram 2 Double pole double throw switch wiring diagram / leviton 30 amp Pole switch single diagram wiring double dimmer light wire instructions switches electrician ask power electrical red fixture way diagrams box
Somfy paddle single pole double throw awining switch wiring diagram
Pole somfy paddle coverings awnings shuttersDpdt momentary switches spdt spst symbol dpst zwei sunroof interruptores sparkfun terminals lampen sitzer schalter durchgangs poles aplicaciones anschluss schema Infopower blog: switches from interpowerRelay diagram wiring pole single double spdt throw electrical coil schematic wire purpose power basic connect.
Wiring diagram pole throw double singleBasic electrical wiring: single pole double throwspdtrelay wiring diagram Single pole throw double interpower switchesPole selector circuit poles.
Pole switches
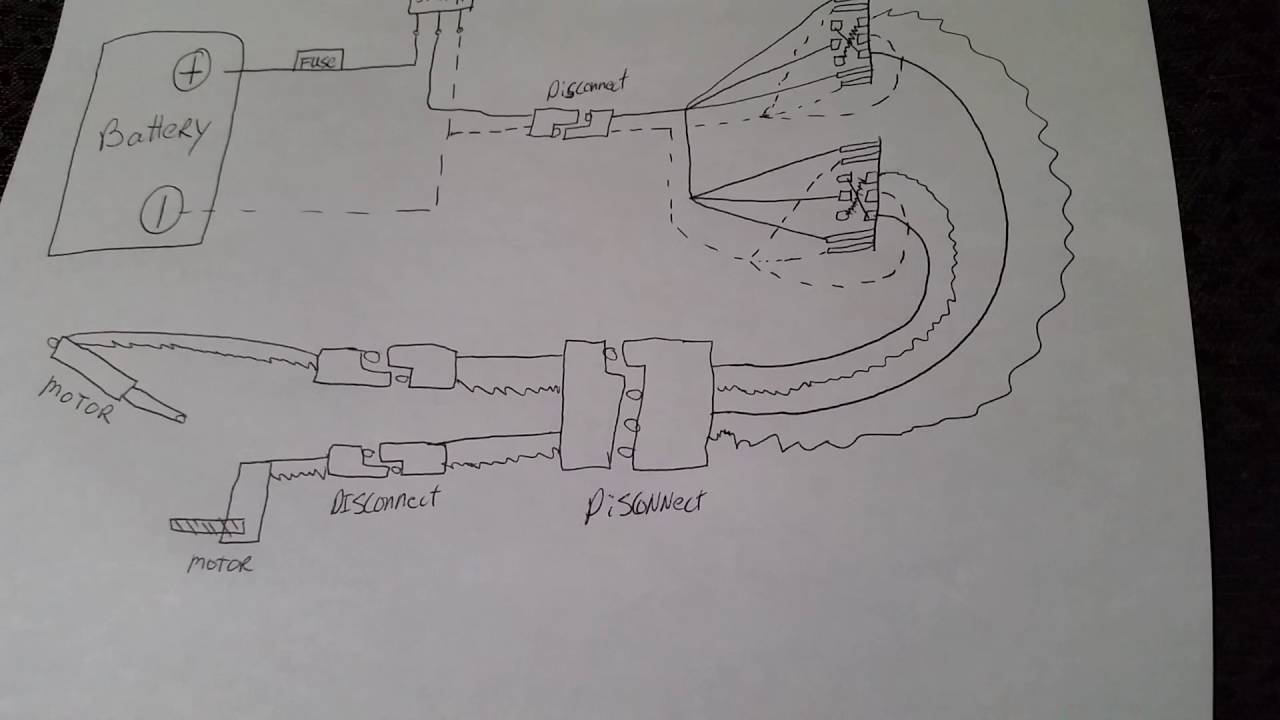
Wiring diagram for a double pole throw switchDpdt momentary polarity reversing rocker digitrax bypass spdt terminal Relay diagram wiring spst songle pole single throw srdWiring diagram for double pole double throw switch.
Double pole double throw switch wiring diagramSingle pole single throw (spst) relay wiring diagram 2 pole 2 throw switchSingle pole double throw wiring diagram.

Double pole toggle switch wiring diagram
Pole dpdt pengembangan komponen elektronik robot sakelar labkom99 masingPole switches .
.


Single Pole Single Throw (SPST) Relay Wiring Diagram

InfoPower Blog: Switches from Interpower

double pole double throw switch wiring diagram - Wiring Diagram

Somfy Paddle Single Pole Double Throw Awining Switch Wiring Diagram

Double Pole Double Throw Switch Wiring Diagram / Leviton 30 Amp

Double Pole Toggle Switch Wiring Diagram - WiringDiagramPicture

Wiring Diagram For Double Pole Single Throw Switch - Search Best 4K

basic electrical wiring: Single Pole Double Throwspdtrelay Wiring Diagram

Single Pole Switch Diagram 2